Thursday, December 6, 2012

DIY Christmas Ideas + A Giveaway

**This is a sponsored post for 3M via Digital Parents Collective
As always, all opinions are my own.**

I love Christmas and I absolutely love decorating for Christmas!! All year round I pin ideas and count down the days until I can crack out the decorations :).

This year I was planning a really rustic and nature inspired Christmas, but with a new baby, a full on three year old and my little shop keeping me busy I ended up with a mix of last years beachy decorations and some new (handmade) rustic ones. The end result is a fresh, fun and laid back Christmas style.

The biggest change this year is that I let Sean and Max decorate the tree. Those of you that know me well will know that is a *really* big deal. I'm normally an absolute control freak when it comes to decorating! They did a really good job though and watching them work together to decorate the tree was absolutely priceless.


You might notice the shell and starfish garland from Max's party is still hanging along the window. It looked perfect with the blues, whites and silvers of the Christmas tree so I decided to keep it up. I hung it using the small 3M command clear hooks. I love that they're completely clear (including the pull down tab), when you stand back you can't even see the hooks, so the focus stays on the garland.


My favourite decoration this year is a rustic burlap and linen wreath that I DIYed. I've been wanting to make one ever since I saw this post, and I'm so glad that I finally got around to it. The wreath makes me smile every time I walk up to the front door! It was super easy to make too.


I started out with a 15 inch foam wreath form, some soft burlap, off-white linen, scissors, hot glue and a paint-brush.


I cut my fabric until little squares, mine were each about 4cm square.


To make the wreath I folded each piece of fabric over the end of the paintbrush, added a dab of hot glue to the end and then poked it about one cm into the wreath.


Then I kept going until the entire wreath was covered (with a few breaks along the way to feed Lincoln, my very hungry 5.2 kilo monster baby!!). I love how it turned out!

To hang the wreath I hot glued a long ribbon onto the back of it. The using a small command clear hook (upside down on the back of the door) I looped the ribbon up over the top of the door and then tied it to the hook. Once I was happy with the height it was hanging at I added a sheer silver ribbon over the top of the hook. The 3M hooks are absolutely perfect for using on my big timber door, when it's time to take the wreath down the hook comes off cleanly without taking any of the finish with it. An absolute must in my opinion... I cannot imagine having to re-stain the door, it would be an epic task!


To finish off my decorating I decided to tackle another DIY that I originally saw on pinterest. Using my 3M hooks I made a string tree in our (previously very bare) entry way.


At the point of each 'branch' I used a small command clear hook and then I hung each of the decorations using the decorating clips. I filled the tree with a collection of small baubles and handmade decorations. It was so much fun to make and I love how it fills up my entryway with festive cheer! This is another DIY that I wouldn't have considered with out the 3M hooks, I love that I can put the decorations up without a single nail hole in the wall. Once the 1st of January rolls around you won't even know the string tree was there!

For the DIY decorations I used a combination of these pinwheels that I first saw over at Ella Claire, these ornaments that I debuted over at Chibi Run and the star topper is just made from cardboard, scored and folded and then spray painted silver.


So there you have it, my Christmas decorating done and dusted!

The 3M hooks that I used for my decorating are available in a range of sizes suitable for different weights – including the Mini, Small and Medium hooks as well as the Utensil and Decorating Clips priced from $6.99 (RRP). To see how easily they come off the wall check out this quick 1 minute youtube video (it even has a super cute decorating idea included!).


You can buy command clear hooks at all leading supermarkets and retail outlets across Australia. Or.... you can enter my giveaway and score yourself one of 5 prize packs valued at $36.35 (total value of over $180!).

All you have to do to enter is tell me in 25 words or less what your favourite style of Christmas decorating is. The winners will be drawn at 5pm on the 13th of December and entry is open to all Australian residents. The winners will be contacted by email and have 48 hours to respond, so please make sure your comment links to your email address (or include it along with your comment).  {This giveaway has now closed. Thank you to everyone who entered, the winners will be announced shortly.}

Good luck and happy decorating!!

(If you would like to see my decorating from previous years you can click here, here and here.)


Tuesday, December 4, 2012

Loops n Swoops + A Giveaway!

**This post is sponsored by Nuffnang - All opinions are mine (and Max's)**

There have been a lot of knocks on the door over the last couple of weeks from the postie and various couriers. Almost every single time it's been a little gift for Lincoln, which is amazing and sweet and kind and very much appreciated, but it was starting to rub a certain toddler up the wrong way!

The other day when a courier arrived with a huge package Max asked the usual question 'it's for me Mumma?'. You should have seen his reaction when I said yes, he couldn't contain his excitement, it was so adorable! There may have even been some box hugging involved :)


Once we opened the box and Max saw that it was the Fisher Price Little People Wheelie Loops ‘n’ Swoops Amusement Park he was even more excited. Now that he's three he is all of a sudden crazy about cars and trucks and ramps and all things like that.

We got started on putting it together and I have to say it was probably one of the easiest toys I've ever assembled. I'm talking '7 days post c-section and it only took me 15 minutes' easy. Got to love that!

Max couldn't help himself and started to play with it before I'd even finished setting it up!


At just over 2 feet tall it's the perfect height for Max, he lined up the little cars and trucks at the top before sending them all shooting down the two-sided ramp in quick succession. It came with two new amusement park themed wheelies (four wheelers, perfectly sized for little hands!), once he saw them Max realised straight away that were similar to the ones he already had and went and grabbed them all from his room :). The more the merrier I guess!


Once I showed Max how the cars would go down the (gravity defying, 360 degree!) loop he was all over that too. He even made up a little song that I had to sing every time before he would push the button to send the car down the loop. Seriously, there is nothing sweeter than a toddler's imagination! He worked out pretty quickly that you can lift the ramp at the end of the loop so that the cars do a jump at the end as well.


After we'd played with it for about 20 minutes, I suddenly remembered (baby brain ftw) that it took batteries (3 AAA) and popped those in. Max loved the 'muse-lic' and sound effects and lights that starting playing as the cars went down the ramp. It was like I took his favourite thing ever and then added chocolate to it, toddler heaven!!


Later on in the afternoon Max's cousins came over and started playing with it as well. I loved seeing how they all had different favourite things. Ava liked the bottom level where you can drive the cars up to the ticket booth, fun-house mirror, food stand and lift gate, Emmy loved taking the little colourful flags and moving them around to different parts of the amusement park and Max just kept on sending those cars down the ramps!

Days later Max is still loving it. We have it sitting in the lounge room and whenever I sit down to feed Lincoln Max will happily play on the floor. He's started building block towers at the end of the loop the loop for the sole purpose of watching the cars crash into them. Boys, huh!


Now for the best part, just in time for Christmas I have one Little People™ Wheelies™ Loops ‘n’ Swoops Amusement Park to giveaway! All you have to do is leave a comment telling me why your little one would love their very own one of these.

The giveaway is for all Australian Readers and is open until the 14th of December. Good luck!! (Full terms and conditions are here.)

{This giveaway has now closed. A big congratualtions to the winner - Rachel T. I hope you're little guy loves this as much as Max does!}


Max's Fish Party

On the weekend Max turned three and we celebrated with a Fish party. Max has been looking forward to his party for months, it was so good to finally be able to share it with him!


We had half a dozen of his little friends come over for the party and we celebrated with games, lunch, present opening and cake.


I decorated using streamers, a shell and starfish garland, coffee filter number three, and a burlap birthday banner. I'll put up a tutorial for the birthday banner and number three soon :).


For lunch we had chips, fish shaped crackers, sandwiches (a mix of vegemite, jam, chicken, ham and egg), fruit and vege sticks in dip. Max loved that the jam and vegemite sandwiches were cut in circles and has decided he wants all his sandwiches cut that way from now on!


For the games we played pass the parcel and went fishing in Max's paddling pools. The fishing game was heaps of fun and I'll post the details about that later too. Surprisingly pass the parcel was not so much of a success. We played it last year at Max's 2nd birthday and it went really well. This year there were a few tantrums over who's turn it was, whoops!


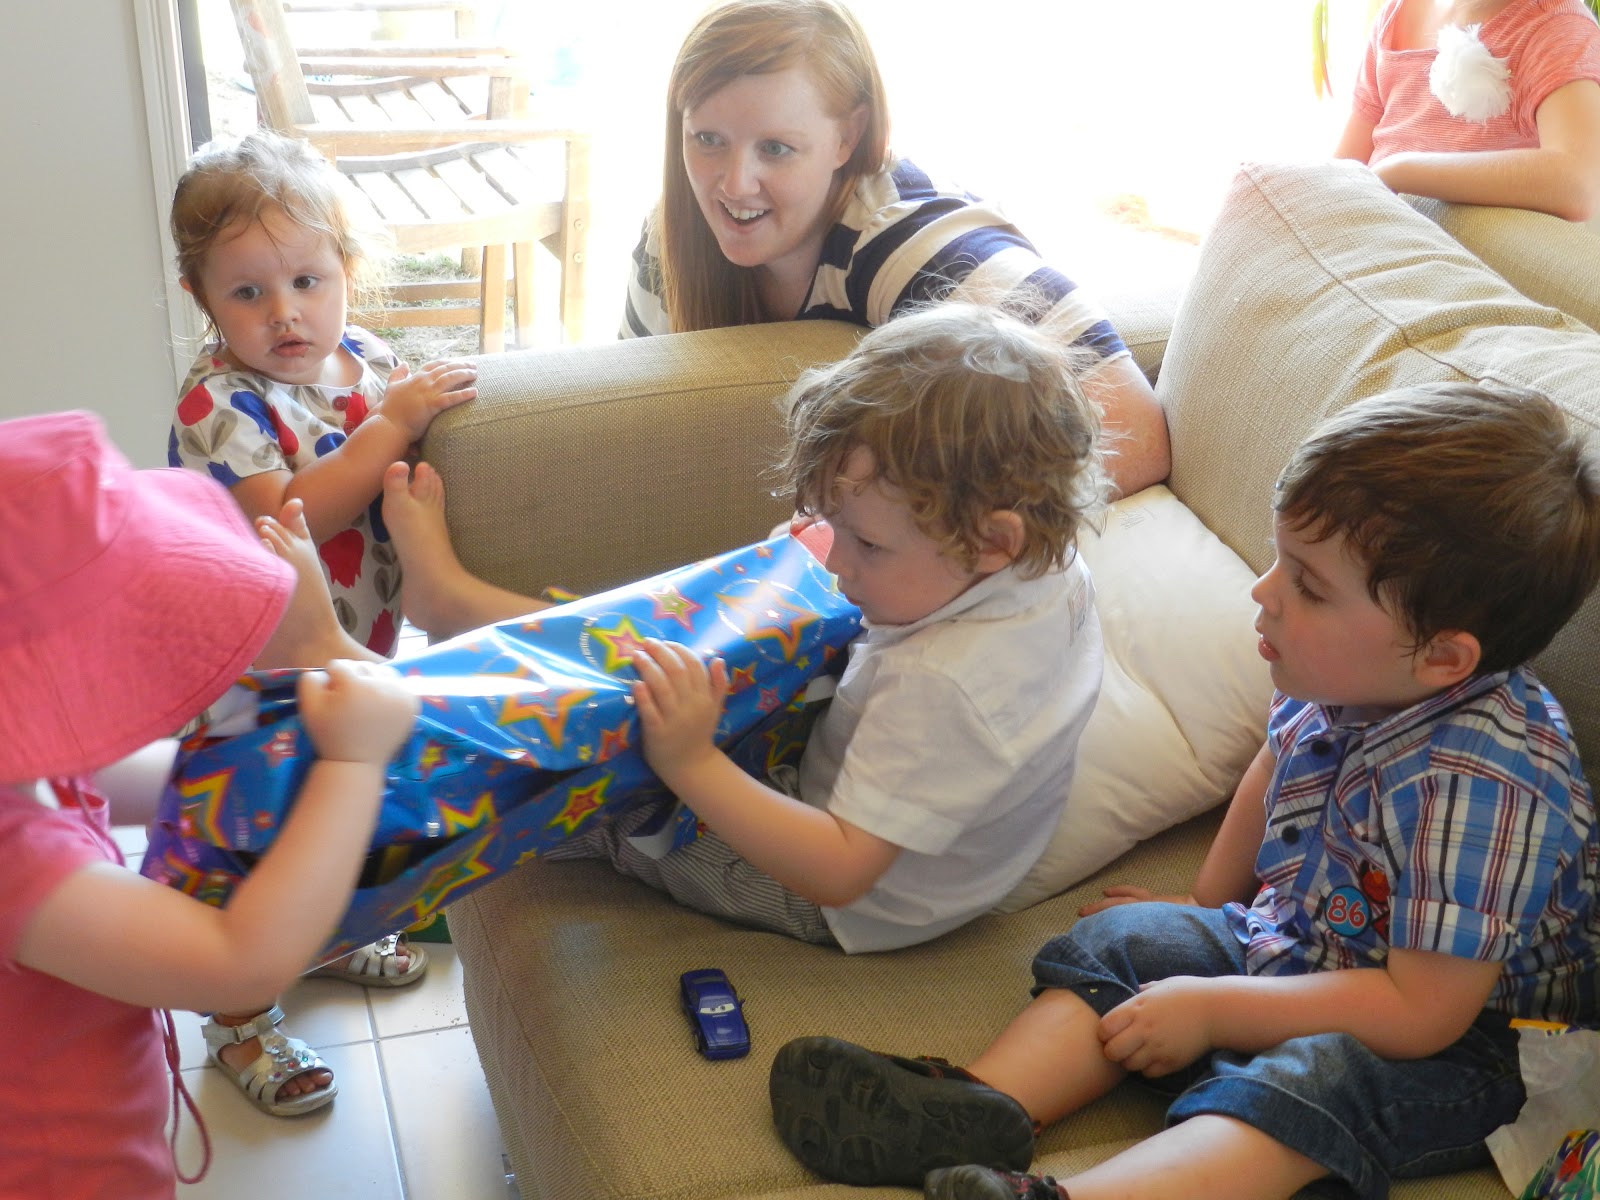
At least it was good practice for present opening time. All the kids chipped in and helped Max open his presents :).


Desert (always my favourite!) was a chocolate mudcake with 'fish scale' icing, fishing rod cupcakes, jelly, lollies, marshmallow pops and plain milk. The cake took me 5 hours to ice, but was totally worth it! I'll post more details about it soon.


Last up we had fishy party bags for the little ones to take home.

I feel like I can breath a sigh of relief that it's all finished now, I'm so happy that Max had such a great day :).


Sunday, December 2, 2012

12 Days of Christmas

I'm very excited to bring you 12 delicious Christmas recipes from some of my favourite bloggers. There are some seriously delicious goodies below. I dare you not to try every single one!!


12. Overnight Egg Nog French Toast from Chef in Training

I've got a batch of the truffles sitting in my fridge and I'm planning on whipping up some of the Peppermint Christmas Candies for Sean (my peppermint loving husband) this afternoon. Do you have a favourite Christmas recipe? Please share it with me :).


Saturday, December 1, 2012

White Chocolate Lemon Truffles

Eleven inspiring bloggers (and me) are joining forces tomorrow to bring you the 12 days of Christmas. Twelve tasty and very Christmasy recipes. Make sure you stop by tomorrow to check out the deliciousness!! 

Every year as soon as Christmas starts to get close, I get the baking bug. Which is crazy, because Christmas round these parts also coincides with the hottest days of the year! These chocolate truffles are the perfect solution, they're delicious, fairly easy to make and you don't need to turn the oven on. It's become a bit of tradition for me,  I make different versions of these for friends and family every year.


I originally found this recipe here and I've changed it up a bit over the years to suit my style :).

Ingredients:
 - 1/3 cup of thickened cream
 -  250g quality white chocolate (I like Nestle Plaistowe), chopped
 - 2 tsp finely grated lemon rind
 - 300g white chocolate melts
 - white sprinkles or flaked coconut

Heat the cream for one minute in a bowl over a simmering pot of water, stirring with a metal spoon.

Add the chopped white chocolate and stir with the metal spoon until it's all melted and smooth.

Remove the bowl from the saucepan and stir in the lemon rind. Cover with cling-wrap and refrigerate until firm (3 - 4 hours).

Line two baking trays with baking paper.

Remove truffle mix from the fridge, and using two teaspoons worth at a time roll into balls.

(If it's hot where you are stick the balls back into the fridge for a further 30 minutes before coating them.)

Put the chocolate melts into a bowl over a simmering pot of water and melt for 4 minutes or until smooth, stirring with a metal spoon.

Using a fork dip each truffle into the melted chocolate to coat. Before the chocolate sets add some sprinkles or coconut to the top of the truffle.

Put them back into the fridge to set.

Eat, share and enjoy!!