Showing posts with label Home. Show all posts

Monday, November 5, 2012

39 Weeks

I am so very very pregnant! That's all I really have to say about that... I'm thrilled that I got to experience pregnancy a second time around and am quite ready to have this baby thank you very much.

I've been trying out a few old wives tales to try and get things moving...

On Saturday my sister and I did a whole lot of walking at the Finders Keepers markets in Brisbane. Hands down best markets I have ever been too! There were so many amazingly talented designers and creators there. I picked up a print each for the boys' rooms from etsy seller Penelope and Pip.


The owl one that I purchased is a little bit different to this one and is for Max's room. When I showed it too him he said, 'that's so funny Mumma, owls don't wear hats' and then started to laugh. So cute!! When I asked for it back he refused to give it to me saying that it was his now :).

I also picked up this adorable monster bib from Columbian trio Amor Amor. I can't wait to get creative and colour it in!


While we were at the markets I also ate the best paella I've ever tasted and a ridiculously decadent strawberry sundae.

I didn't go into labour though...

On Sunday we had Max's bff and her parents over for lunch. I post about the two of them regularly (here and here most recently) and they really are just the cutest pair on the planet!


By that evening I was completely over being pregnant and soooooo uncomfortable so we tried out a few more 'labour inducing techniques', we went for a walk and I ate a really spicy indian curry (which was dumb because I hate spicy food).

I woke up this morning still very very pregnant and have resigned myself to the fact that the baby will probably come out when it's ready regardless of what I do...

Although if you have any suggestions for me I'm all ears.....


Thursday, August 16, 2012

Max's Wardrobe Make-Over

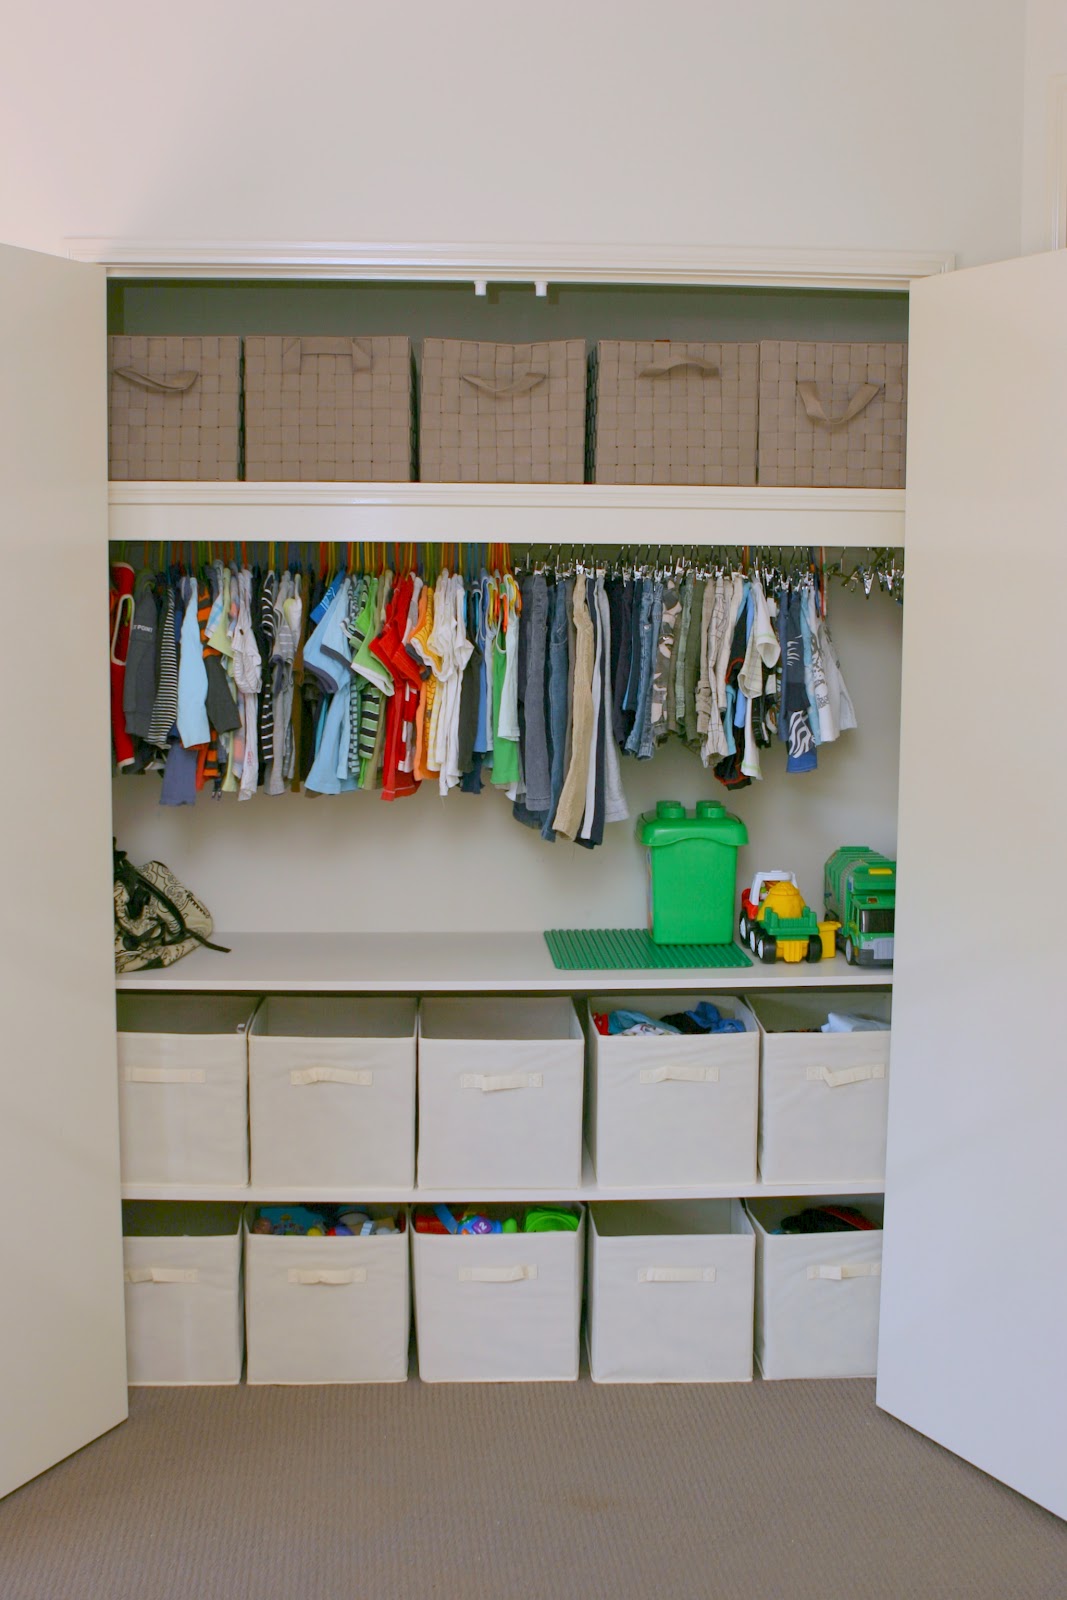
This week I ticked one of the things off my long to-do list for Max's big boy room. I added shelving and storage boxes to Max's wardrobe. It's one of those DIYs that probably doesn't look like much, but it makes me seriously happy! There is nothing like a well organised space to make you smile :)

I made the shelving from scratch and like I often do I just winged it. I asked Sean for advice, but he kind of said 'just do whatever you want'. So rather than googling or youtubing for tips on making shelving I went in blind.

It took me a bit of trial and error to get it right and because I was concentrating so hard on not hammering un-neccesary holes into the wall I didn't take as many photos as I would have liked, and some of the ones I did take were just on my phone.


This is the space I started with. It's a lot wider than it looks in the photos - 1.7m wide to be exact. This room used to be our home office / craft room so the wardrobe was a bit banged up with lots of marks on the inside of it. I didn't worry too much about them though, you can't see them once the wardrobe is full.


We have a new Masters that has opened up just near home so I picked up all of my supplies from there. They offer a free cutting service so I got my boards and support timber cut to size before I loaded it all into my little corolla. It all worked out really cheaply too. I got the materials for under $45, the ten cloth storage boxes for $4.98 each and the 5 larger woven baskets for $12 each.

Once I got the boards home I primed and painted the shelves - I painted them the same colour as the walls in Max's new room (canvas cloth by Bristol Paints).


To instal the shelves I ran two rails (for the two shelves) around the walls of the wardrobe. I didn't get a better photo or a shot of the railing running the whole way round... You'll just have to picture it.


Then all I did is put the painted shelves on top of the rails. I didn't even need to screw the shelves to the railing, they're wedged in there so tight that they're not going anywhere.

I put Max's clothes and toy baskets back in and that was that. All done!!

It makes such a difference having a perfectly organised space. I seriously can't wipe the smile off my face each time I open the wardrobe doors.

(Max doing a random pose in his big boy undies - I swear he doesn't get it from me!)


I'm so glad to have that part of his room finished. Next up I'm going to spray paint some frames for his art wall and install some open shelving on one of the walls. Can't wait to share it with you!


Tuesday, March 20, 2012

DIY Outdoor Chalkboard

There's nothing quite like a Pinterest Challenge to help a girl get her DIY mojo back!

On the weekend I tackled a quick and easy project for Max. An outdoor chalkboard.

Max loves to draw so I was really hopeful that he would love this, and he does! Once I let him loose with his jumbo chalk the only thing that could drag him away was the lure of the trampoline.

I was inspired by this project from the pinterest challenge.

...

I started out with a 900 x 1200 piece of marine ply from bunnings and I painted it with some left-over chalkboard paint that I had from my kitchen chalkboard. I thought I was going to need three coats, but after only two it was perfect. I also painted along the top, bottom and side edges just to give it a little bit more protection from rain.


Try not to be jealous of my designer outdoor area (sarcasm). One day we will get there!
Because of where I was planning on screwing it into the fence I also added some extra bits of wood to the back of the board to help prevent it warping over time. I used liquid nails to attach it so that there wouldn't be any nails or screws getting in the way of Max's artistic endeavors.


Once the liquid nails had set Sean gave me a hand attaching it onto the fence. We just used regular timber screws (making sure that they weren't long enough to pop through on the neighbours side of the fence).

That chalky look is from where I 'seasoned' the board with white chalk.
We decided to hang it down the side of the house next to the clothesline. It's a part of the yard that isn't really seen, meaning that the chalkboard won't get in the way of the landscaping I'm (one day) planning to do.

Random Cooper photo :)
I added a chalk tin and some jumbo chalk and we were ready to go.

Max (and his cousins) absolutely love it!


Like I said, it was really easy and it was super cheap too:

Marine Plywood -  $10.50
Chalkboard paint - $0 (left-over from another project)
Timber Scraps - $0 (left over from a retaining wall we built)
Screws - $0 (from the massive tub of screws we have in the garage
Chalk tin - $4 from a dollar store
Chalk - $6 (but you can definitely get it cheaper)
Total - $20.50 (if you had to buy everything you'd probably be looking at around $35 - $40 at the most).

Probably the easiest DIY I've done to date!

...

My entry into Just Something I Whipped Up sponsored by Appliances Online and the Bosch Washing Machines


...


Tuesday, January 24, 2012

DIY Dry Erase Meal Planner

As I mentioned in my last post, my sister and her two girls have temporarily moved in with us. We're only three weeks in, but so far it's only bringing good things.

One of the best parts is having someone to share cooking duties with. One thing you might not know about me is that I HATE cooking dinner. I don't mind baking or cooking for parties, but I find cooking dinner one of the most boring chores I ever have to do.  Sean is a great cook and he likes to cook, but he also works full-time, doesn't get home until 6pm and by then he usually just wants to sit down and eat. So before Jen moved in there were lots of arguments about who would cook and we would often end up getting take aways.

Now Jen and I are taking turns with the cooking. And even better, because she is a health nut I have (almost) stopped buying take out and am actually cooking on most of my nights. Big win!

In honour of our new arrangement I put together a quick paint-chip dry erase meal planner. It helps us keep track of who's cooking on which night. Plus Sean loves checking out what's on the menu before he heads off to work each day! I got the inspiration from here via Craft Blog.

The photos I took of it are all on an angle because I've hung it in the small hallway that our walk-through pantry backs onto. I could have taken it back down off the wall to photograph, but I was feeling a little lazy.


Simple, and definitely not fancy. But it's tucked away out of sight and absolutely perfect for what we needed!


Tuesday, December 13, 2011

A Blue & White Christmas

Finally! My Christmas decorating is done and I have gotten around to taking photos :)

As I mentioned earlier in the month, I decided on a blue and white theme, but also included nature inspired elements. I wanted to keep an Aussie feel about it all.

For the front door I made a really simple wreath from sticks and hot glue. I just went down to the 'carefully cultivated to look like true-blue bush' nature reserve near my place and picked up a bag full of sticks off the ground.


I like it, but I think I might go with something a bit more traditional next year.

I decided to put the tree up in the dining room this year. So that ended up being the room that got the most Christmasing (yes that definitely is a word, regardless of what spell check says). Keep in mind though our house is open plan, so really the whole place feels Christmasy :)


I diy'ed a lot of the ornaments and other bits and pieces this year. I'll do a post tomorrow with more details about each of them.


I also made this tiny little Christmas village out of air-dry clay, and it sits on the window sill in the dining room.


In the kitchen I wiped down my chalkboard and then wrote up the words to 'away in a manger', one of my favourite Christmas Carols.


In the main living area I added in a few extra Christmas decorations. A bowl of baubles and my gorgeous Christmas spider (courtesy of Tanya from dans le townhouse). I hung heaps of my diy clay stars on the potted tree next to our picture window, and I added more lights and decorations in our wall cut out.


So there you have it. My decorations for Christmas 2011. Don't forget to check back in tomorrow for some DIYs :)


Thursday, September 1, 2011

The Long Overdue Tile Update

.....and it's a vlog! Woot, my first one.


I hope you enjoyed my first video post :)