The bed in Max's room at the moment is uggg-lllly. It's functional and actually used to be Sean's bed when he was (a lot) younger, but there is absolutely nothing attractive about it... For ages now I've been planning on making it over, the Pinterest Challenge was just the kick in the butt I needed to get it done.

I ambitiously gave myself a day to do the make-over and even thought to myself 'I might whip up a new doona for the bed if I have time'. Ummm no... It took me two days to get the whole thing done, but now that's it's finished I'm so glad I finally tackled it!
Here's what I started with...
A king single ensemble. Like I said, functional but not exactly stylin'.
I split the project into two parts. First up I covered the base of the ensemble and added legs, then I made a headboard. I got my inspiration from these three pins below.
 |
| {source} |
 |
| {source} |
 |
| {source} |
- linen
- cheap white poplin
- batting
- 2inch thick foam
- mdf board
- button covering kit
- furniture legs
Tools
- screwdriver
- drill bit
- staple gun and staples
- embroidery needle
- embroidery thread
- nails
- plyers
- hammer
I started out by covering the base of the ensemble with my cheap poplin, which I used because I didn't want that bright pattern showing through the loose weave of my linen. I pinned each strip in place and then went around with my staple gun to secure it to the underside and top of the base.
I then did the same thing with with the linen, only I paid a bit more attention to the detail and made sure the corners looked neat and tidy.
As I was going around securing the linen I noticed the staples weren't holding the fabric to the top side of the base. Underneath was fine because the staples went straight into plywood, but on top they were only going into fabric which meant they came out really easily. I ended up using nails for the top because they went through the fabric and back down into the ply. In other words I made things up as I went and wished for the best!!
Once that was all done I attached the legs and moved on to the headboard.
I measured up Max's bed before hitting up Bunnings and decided that I wanted my mdf to be 1100 x 1100 and got them to cut it in store for me. Lucky I did, there is no way I would have fit anything bigger into the back of my car :).
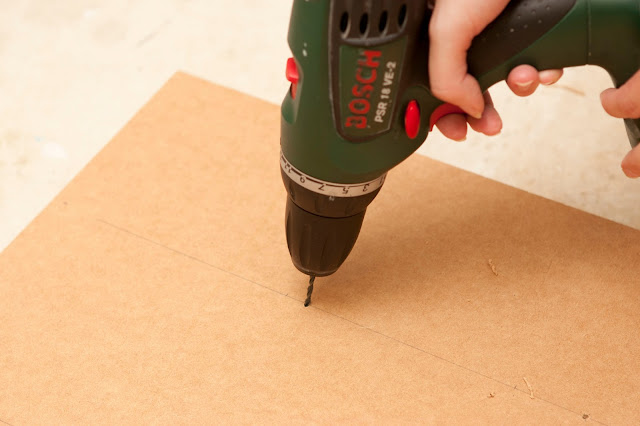
To start off the headboard I measured out where I wanted my buttons and then drilled holes through the mdf (gorgeous hand model used as I was behind the camera, thanks J!!).
Then it was just a matter of covering the board and foam with batting, then my el-cheapo lining and finally my linen (I used the poplin underneath the linen again because I didn't want the batting poking through the weave of the fabric).
Then came the most time consuming and difficult part. Covering the buttons and sewing them onto the headboard to get that tufted look that I love so much! Soooo much harder than I expected, but so definitely worth it!
Covering the buttons was just a matter of following the instructions on the packet, attaching them was a whole other ball game... After a fair bit of trial and error I worked out the best way to do it.
I threaded the needle with embroidery thread and then tied it into a loop. Then I tied it onto the button. I didn't take a photo, but if you can picture the needle with a decent amount of thick thread on it and then a button tied onto the very end of the thread.
To get the buttons in the right place I pushed a nail through the pre-drilled holes in the back of the board, felt where the point of the nail touched my fabric and then pushed my needle and thread (with the button attached) up through the the fabric, batting and foam etc until it came out the back of the board. With one hand pushing my needle through, and pliers in the other hand I grabbed onto the needle and pulled it right the way through. Then I would tie a big knot in the thread, pull it as tight as possible and secure it with staples.
That probably made no sense what-so-ever... If you want to give this a go and have no idea what I'm on about email me and I'll try and explain it better :)
I'm sooooooo happy with how it turned out and Max absolutely loves it! He knows it's the same bed, but he still likes to call it his 'new bed' and he's so excited to go to bed in it tonight. The real test will be whether or not he stays in there the whole night I guess!


Phew, now that I finally have it finished I'm linking up with Katie, Sherry, Megan and Michelle (and checking out all of the amazing projects that have been shared).
Thanks for reading!!

{If you would like to see any of my previous pinterest challenge projects you can see them below}
 |
| {link} |
 |
| {link} |
 |
| {link} |
 |
| {link} |
 |
| {link} |


